Dec 30, 2009
by mohamed hanoosh
Port used by Pidgin for chatting is different from that of the web. In networks where only web proxy is allowed you have to change the port number. For using google talk, the different options can be configured as shown below

Posted in:
desktop,
internet
|
|
|
Nov 1, 2009
by mohamed hanoosh
I have a wide screen laptop, but I want to get as much vertical space as possible. Here are some of the things I did for that purpose.
- Removed one of the panels. I removed the bottom panel. To retain the list of opened windows I added window list applet to top panel. The trash applet also you can add to top panel. For switching the desktop I uses keyboard short cuts (Ctrl+Alt+Arrow), so that is not a problem
- Reduced size of the panel. By default gnome panel does not reduce the size after a limit(24pixels I remember). If you want to reduce more than that limit, you have to reduce the font size and icon size. I set my application font size to 8px. For reducing icon size I did a hack I got somewhere from internet. Go to the Icons directory you r currently using(either in /usr/share/icons/< icontheme>/ or .icons/< icontheme>/). Rename the 24x24 directory to something else. Create a new link to 16x16 with the name 24x24. Then I could considerably reduce the panel size. U can see that the top panel is enough to include all opened windows. A small panel looks better than a bigger one
- For a nicer look I added a awn dock and put it in auto hide option so that it won't cover opened applications.
Posted in:
desktop,
gnome
|
|
|
Oct 20, 2009
by mohamed hanoosh
Often we have to read input from the user through console and most of the time we need to read primitive types(int,long,float,char ...). For reading an array of integers as input , we often coded as shown below. That is we input was read as a string and converted to integer for using it.
        int[] array = new int[size];
        try {
            BufferedReader br = new BufferedReader(new InputStreamReader(System.in));
            for (int j = 0; j < array.length ; j++) {
                    int k = Integer.parseInt(br.readLine());
                    array[j] = k;
            }
         }catch (Exception e) {
                e.printStackTrace();
         }
From J2SE 5.0 onwards Java has added a new classes called
Scanner which is basically used for reading primitive types of data. The above code can be implemented with the Scanner class as shown below.
        int[] array = new int[size];
        try {
            Scanner in = new Scanner(System.in);
            for (int j = 0; j < array.length ; j++) {
                    int k = in.nextInt();
                    array[j] = k;
            }
         }catch (Exception e) {
                e.printStackTrace();
         }
Scanner class is pretty much simpler to work with than the BufferedReader, when you have to read only the primitive types.
Scanner class can also be used for parsing input based on regular expression. For more details check
http://java.sun.com/j2se/1.5.0/docs/api/java/util/Scanner.html
Posted in:
code,
java
|
|
|
Oct 19, 2009
by mohamed hanoosh
The laptop users usually want switch their network when they move from place to place. The easiest way to do this is using the
Network manager. You can configure more than one connection and select the one which you want at that moment.
You might have seen the Network manager applet on your GNOME panel.

You might have also noticed that it shows not connected even if your system is connected to network. This is because the network is configured in your system using some other method(For example /etc/network/interfaces and the networking service). To use the Network manager do as follows
Edit the file
/etc/NetworkManager/nm-system-settings.conf[main]
plugins=ifupdown,keyfile
no-auto-default=00:29:d1:62:2e:c5,
[ifupdown]
managed=true
Change the value managed to
true(managed=true).
Now your networking device is managed by the the Network manager. You may require a restart.
To add different addresses, right click on the applet on your panel(In KDE, a plasma widget is available for network manager. In GNOME the applet is on the panel)
Add your network address. You can add more than one address, and different names for each of them. To enable a particular address at a time , left click on the applet and select the one you want.

Posted in:
desktop,
internet
|
|
|
Aug 4, 2009
by mohamed hanoosh
I have been searching for a good pdf reader in which I can highlight or underline the text I want. Such a functionality is useful for reading ebooks and reviewing papers. I tried many pdf readers like
Evince),
Kpdf(GNOMEKDE),
Adobe acrobat reader,
xpdf,
Sumatra.. . They lack the functionalities I want.
Acrobat professional , and
Nitro pdf has the functionalities but they are not free.
Scribus,
pdfedit etc found in Linux are told to have pdf manipulating abilities but whenever I tried them it failed, I mean it stopped giving some error.
Okular found in KDE4 is very good, but it lacks undo capacity (when I tried), and it is not smooth in my Ubuntu.
Finally I found
PDF-Xchange viewer. It has the capability to underline, highlight the text and to do many more . It is a free software too. It is available only for Windows. In wine installation it run smoothly. So I can use it in linux too.

Posted in:
desktop,
pdf,
utility
|
|
|
May 24, 2009
by mohamed hanoosh
fortune is a utility for displaying random text items from a database. The data files for fortune is kept in the directory /usr/share/games/fortune by default. We can add our own data files to it.Suppose you want to display a random quote of Einstein whenever you type fortune einstein , as shown below.
hash@ssl51:~$ fortune einstein
"The eternal mystery of the world is its comprehensibility."
For that you have to create a data file with quotes from Einstein, and a 'dat' file for getting a random item from the quotes. The procedure is as follows.
Create a file containing the quotes (items to be displayed) such that each quote is seperated by '%' symbol.
"Any intelligent fool can make things bigger, more complex, and more violent. It takes a touch of genius -- and a lot of courage -- to move in the opposite direction."
%
"Imagination is more important than knowledge."
%
"Gravitation is not responsible for people falling in love."
%
"I want to know God's thoughts; the rest are details."
%
"The hardest thing in the world to understand is the income tax."
%
"Reality is merely an illusion, albeit a very persistent one."
%
"The only real valuable thing is intuition."
%
"A person starts to live when he can live outside himself."
%
"I am convinced that He (God) does not play dice."
%
"God is subtle but he is not malicious."
%
"Weakness of attitude becomes weakness of character."
%
"I never think of the future. It comes soon enough."
%
"The eternal mystery of the world is its comprehensibility."
%
"Sometimes one pays most for the things one gets for nothing."
- Now you have to create a 'dat' file for obtaining random item. For that you can use a tool strfile. If you have fortune-mod installed then the tool will be available. Suppose the file created in lasst step is named einstein. To create the datafile, just type as follows
hash@ssl51:~$ strfile einstein
"einstein.dat" created
There were 14 strings
Longest string: 168 bytes
Shortest string: 41 bytes
- Now move both files to /usr/share/games/fortune
hash@ssl51:~$ sudo mv einstein /usr/share/games/fortunes/
[sudo] password for hash:
hash@ssl51:~$ sudo mv einstein.dat /usr/share/games/fortunes/
It's done. Just type fortune einstein and see the result
hash@ssl51:~$ fortune einstein
"Imagination is more important than knowledge."
For more fun with displaying the text, check
http://tech-hanoosh.blogspot.com/2009/05/cowsay-dialogues-by-cow-in-terminal.html
Posted in:
desktop,
tricks
|
|
|
May 19, 2009
by mohamed hanoosh
Cowsay is a utility for printing text as dialogues (as a balloon) by cow.
hash@ssl50:~$ cowsay "Carry on"
__________
< Carry on>
----------
\   ^__^
\  (oo)\_______
  (__)\       )\/\
      ||----w |
      ||     ||
A variety of 'cows' like skeleton, tux, devil, dragon, turtle, etc are available. For more available cows check the directory /usr/share/cowsay/cows.
hash@ssl50:~$ cowsay -f tux "Carry on"
__________
< carry on >
----------
   \
    \
        .--.
       |o_o |
       |:_/ |
      //   \ \
     (|     | )
    /'\_   _/`\
    \___)=(___/
For more fun , redirect
fortune output to cowsay and put in .bashrc .
hash@ssl50:~$ fortune | cowsay
___________________________
/ Exhilaration is that feeling you get  \
| just after a great idea hits you, and |
| just before you realize what is wrong |
\ with it.                              /
---------------------------------------
\   ^__^
 \  (oo)\_______
    (__)\       )\/\
        ||----w |
        ||     ||
Posted in:
cowsay,
desktop,
tricks
|
|
|
Apr 30, 2009
by mohamed hanoosh

Gnome-do is a powerful utility to deploy applications or directories. You can start applications, visit url, or browse through directories .. without moving your hands from keyboard to mouse.
Install gnome-do. Strat it(u can assign a short cut key ). Just type the name of application, directory,url .. you want. Press Enter key. You will get what u want.
Posted in:
gnome,
utility
|
|
|
If you want to execute a series of commands with root privilege then it is cumbersome to type sudo before every command. Instead just type
sudo -i This will take you to root login with required environment variables. You can continue your work there.
hash@ssl50:~$ sudo -i
[sudo] password for hash:
root@ssl50:~#
For more details check manpage for sudo.
Posted in:
command,
desktop,
tricks
|
|
|
Apr 29, 2009
by mohamed hanoosh

pdftk (pdf toolkit) is a tool for manipulating pdf files. It can be used for
- concatenating pdf files
- splitting files
- update files
- ....
It's very easy to use the tool. For example, to combine two pdf documents say part1.pdf and part2.pdf to get full.pdf just type
pdftk part1.pdf part2.pdf cat output full.pdf
For more details visit
http://www.accesspdf.com/pdftk/
Posted in:
desktop,
document,
pdf,
utility
|
|
|
Apr 11, 2009
by mohamed hanoosh
zenity is a tool for displaying gtk+ dialogs from command line or shell scripts. It can be used for displaying various kind of dialog boxes.
It is easy to use zenity for simpler applications compared to writing a
GTK based program.
Following are some of dialogs that can be created using zenity.
- Read text (entry)
hash@ssl50:~$ name=`zenity --entry --title="Example" --text="Your name please"`

- Calendar
hash@ssl50:~$ zenity --calendar --title="Example" --text="Select the day"

- Filechooser
hash@ssl50:~$ filename=`zenity --file-selection`

- Question
hash@ssl50:~$ zenity --question --text="Are you sure ?" ; echo $?

Check man page of zenity for more information.
Posted in:
desktop,
gnome,
utility,
zenity
|
|
|
Apr 5, 2009
by mohamed hanoosh

Gnome global keyboard short cuts can't be applied to
Amarok, which is basically a
KDE application. There is an amarok script available (
Gnome Multimedia Keys in
kde-apps.org ) for mapping those keys to the amarok short cuts. Extract the package and just run the python script. Whenever the script is running and amarok is ON the keys will work.
For more details visit
http://www.kde-apps.org/content/show.php?content=60910
Posted in:
amarok,
desktop,
gnome,
kde
|
|
|
Apr 3, 2009
by mohamed hanoosh
I like Ubuntu and hence
gnome very much. When I use it in my laptop a lot of visible area is occupied by different interfaces (like the tool bar,menu bar etc). I thought reducing the font size can give enough work space. Here are two methods I could find out for doing that
Posted in:
desktop,
font,
tricks
|
|
|
Apr 1, 2009
by mohamed hanoosh
Now
Gmail has introduced the facility to mail in Indian languages. This setting is made active by default in India. If it is not active just go to settings, language section, enable transliteration. You should have the necessary fonts in you machine.

For typing in a language, just select the language in the compose page. Type as you speak in your language (transliteration).
For more details visit
Official Google Blog: Email in Indian languages
Posted in:
internet,
mail
|
|
|
Mar 28, 2009
by mohamed hanoosh
 Basket
 is a note taking application for KDE. It is available for ubuntu also. It has a lot of features compared to other note taking applications.
Following are some of of it.
- Add note at any location of the page.
- Grab screen shots
- Drag note entries
- Tag each note entry (shortcuts are available for this)
- important
- todo lists
- links
- idea,information,personal
- Collapse lists
- Create links to files and urls
- Export
For more details visit
http://basket.kde.org/
Posted in:
desktop,
utility
|
|
|
Mar 25, 2009
by mohamed hanoosh
It is desirable to minimize applications to system tray rather than messing up the task bar. In Linux many applications has its own extension to get minimized to system tray.

Browsers are application which is needed all the time. We would have at least some web pages opened in it if we are in a work.
Opera has its extension to minimize to system tray, along with. For
Firefox you have to add the extension (add on)
FireTray (in linux). It will show a firefox icon in the system tray whenever firefox is opened. To minimize the browser, just click on that icon. To restore, click on the same icon.
Posted in:
desktop,
tricks
|
|
|
Mar 22, 2009
by mohamed hanoosh
Proxy server is as an intermediate for a machine(client) to connect to another machine or network. All outside connections of the client can be done by the
proxy server. Proxy server can be used for setting firewall in a network.
Other than just forwarding requests from client, proxy servers can cache some data(web pages,DNS,network lookups) it has already retrieved. Such proxies are called
caching proxy. The proxies which does not change the packets other than just forwarding it is called
transparent proxy.
Squid is a free and open source web proxy server. Quick steps for setting up a transparent proxy server is given below.
- Install squid
hash@ssl50:~$ sudo
apt-get install squid squid-common
- Configure /etc/squid/squid.conf
Squid configurations uses acl. To allow local machines to connect to it you have to add access right to localnet The file contain an acl called localnet representing the local network..acl localnet src 10.0.0.0/8 # RFC1918 possible internal network
acl localnet src 172.16.0.0/12 # RFC1918 possible internal network
acl localnet src 192.168.0.0/16 # RFC1918 possible internal network
# http_access allow localnet
Note down the http_port given in config file. Usually it is set to 3128. You may change it. This is the port number to which clients has to connect to for using the proxy server.- Restart squid
hash@ssl50:~$ /etc/init.d/squid restart
Authentication can be enabled in squid. Timed firewalls can be set using Squid. Squid also permits to add our own scripts for managing things. For more details , visit
http://www.squid-cache.org/
Posted in:
lan,
proxy,
server
|
|
|
Mar 19, 2009
by mohamed hanoosh
Samba is a free software implementation of network
file sharing application protocol (
SMB/CIFS) of windows. It allows sharing of files,
parallel port devices, printers in a network.
Some examples for using samba is given below.
- Add a share
- Edit the file /etc/samba.smb and append the following (modify according to your requirements)
[Programs]
path = /home/hash/Programs
valid users = hash
read only = no
create mask = 0777
directory mask = 0777
[Collection]
path = /home/hash/Store
guest ok = yes
read only = no
- Restart samba server
hash@ssl50:~$ sudo /etc/init.d/samba restart
* Stopping Samba daemons
* Starting Samba daemons
- Adding a user
- Adding the user hanoosh
hash@ssl50:~$ sudo smbpasswd -a hanoosh
New SMB password:
Retype new SMB password:
Added user hanoosh
Posted in:
desktop,
file sharing,
lan,
samba,
server
|
|
|
Mar 13, 2009
by mohamed hanoosh
I don't have any mail clients configured. I used to get difficulties in sending mail by clicking
mailto links. There is a solution in firefox 3 for gmail ( originally posted in
lifehacker). Check it out
Official Gmail Blog: Tip: Set Gmail as your default email client in Firefox 3.
Posted in:
internet,
mail,
tricks
|
|
|
Mar 12, 2009
by mohamed hanoosh
lsb_release is a command which gives linux distribution related information of the current installation. For example the following command gives all description of the current installation
guest@debian:~$ lsb_release -a
No LSB modules are available.
Distributor ID: Debian
Description:    Debian GNU/Linux 4.0r7 (etch)
Release:        4.0r7
Codename:       etch
For more options check man lsb_release
Posted in:
command,
desktop,
distro,
installation
|
|
|
Mar 9, 2009
by mohamed hanoosh
Command line tools like wget,apt-get requires the variable
http_proxy to be initialized , to access the internet if proxy only is available. The format is as follows
http_proxy=http://user:password@proxyhost:portnumber.
For example
$ http_proxy=http://hash:mypassword@192.168.40.1:3128
Then execute the applications needed.
Posted in:
internet,
proxy
|
|
|
Mar 6, 2009
by mohamed hanoosh
Do you like displaying random quotes(adage/epigram) on your terminal each time you open a terminal?
fortune is a utility which print a random, hopefully interesting, adage each time the command is executed.
hash@ssl50:~$ fortune
He who opens a school door, closes a prison.
            -- Victor Hugo
To get the output displayed each time you start a shell append the fortune command to end of the file
.bash_profile ( or
.bashrc) in your home directory (create the file if it does not exist).
To get more variety of quotes install more fortune cookies.
Posted in:
command,
tricks
|
|
|
In one of my earlier post, I mentioned how to
set up an Ubuntu mirror and using it for installing Linux. There are many other ways to install Linux in more than one machine(as in the case of a lab).
Suppose you have one machine which has all the softwares installed and other necessary settings. This installation can be cloned to another using cloning tools like
g4u.
g4u(Ghost for Unix) is a cloning tool, which comes as a live CD. Booting with g4u live cd will take to a terminal. Typing help will display the commands available. It has options to upload an image to ftp server, restore image from ftp server, copy from one hard disk to another. All the commands are self explanatory.
Posted in:
installation,
lan
|
|
|
Mar 4, 2009
by mohamed hanoosh
Other than the xserver which is currently you are using, there are other consoles where you can login and do your work simultaneously.
Key combinations
Ctrl+Alt+Fn(n starts from 1): For switching into virtual consoles
Ctrl+Alt+Fm(m starts from 7): For switching into different screens(If you have started many screens).
Compared to windows we can have more than one screen in linux (Don't confuse it with the concept of multiple desktops. Each of the screen can have more than one desktop !!!!).
For starting a screen, login into a virtual console, then give the command
$ startx -- :1
The last argument :1 is the screen number. If a new screen is to be started, another number should be used, say :2.
Multiple screens are useful in many occasions. For example during a presentation the faculty can start two screens. One screen for him to workout things which is not made visible to audience. Another screen to display things using the projector(by toggling the LCD/CRT button).
Posted in:
display,
tricks,
xserver
|
|
|
Mar 1, 2009
by mohamed hanoosh
I wanted to install Ubuntu in more than one pc. Installing using CD in each machine is time consuming. Net installation is another option. I decided to boot from a CD and obtain install image and packages from another machine(let me call it 'server'). Server machine should should have an Ubuntu mirror. Preparing an ubuntu mirror using apt-mirror needes downloading a lot of packages from other mirrors. Alternatively ubuntu(alternate) cd could be used for the same puropse. The steps are given below.
Setting up the server
Client
Obtain
mini.iso for netinstall from ubuntu.Alternative a pendrive could be prepared for booting the client.
Boot with the CD and give the the options as and when required untill the installation mirror is asked. Scroll up to the top and select the manual install mirror. Give the server name, say server.yourdomain.com, directory , /ubuntu , as we had mounted it in the folder ubuntu. Give necessary proxy url in the next screen. Further steps are same as the normal installation.
Posted in:
installation,
lan
|
|
|
Feb 27, 2009
by mohamed hanoosh
Java has a
for loop, but it didn't have a for each functionality. From jdk5.0 onwards they have added
for each functionality in Java.
public class Example{
public static void main(String args[]) throws Exception {

    int[] values = { 2,4,6,8,10,12,14,16,18,20 };

    for( int i : values)
    {
        System.out.println(i);
    }

}
}
Given an array, a loop variable can select each element of the array in each iteration.
In the above example
values is an array of integers.
i is an iterator(a variable used for traversing through the elements). In the first iteration
i will take value
2 , then it next iteration value
4 and so on until the entire array elements are used.
Posted in:
code,
java
|
|
|
Feb 21, 2009
by mohamed hanoosh
A partition can be formatted to different file systems. For a pen drive FAT partition is adopted universally. Linux partition is commonly ext3/ext2/ext4/reiserfs.. . Windows usually work with FAT or NTFS partitions.
For formatting a partition as FAT ( as in the case of a pen drive ), give the command
mkfs.vfat /dev/sdb1
where /dev/sdb1 corresponds to the required partition. To get partition number plug in the device, mount it (automatic), get the number from /etc/mtab.
Note: The partition should have unmounted before formatting it.
Similar commands
mkfs.bfs       mkfs.ext2      mkfs.minix     mkfs.reiserfs
mkfs.cramfs    mkfs.ext3      mkfs.msdos     mkfs.vfat
can be used for formatting as other file systems.
GUI tools for formatting a partition are
gparted (for Gnome) and
qtparted (for kde).
Posted in:
desktop,
format,
partition
|
|
|
Feb 11, 2009
by mohamed hanoosh
fdisk is used for partitioning disks. It can be used for creating , deleting partitions , change fs type, labelling etc. It can be executed only as a privileged user. Simply type fdisk followed by the device file name as shown
$ fdisk /dev/sda
The number of cylinders for this disk is set to 30394.
There is nothing wrong with that, but this is larger than 1024,
and could in certain setups cause problems with:
1) software that runs at boot time (e.g., old versions of LILO)
2) booting and partitioning software from other OSs
(e.g., DOS FDISK, OS/2 FDISK)

Command (m for help):
Different operations needed can be specified here. To get a list of possible operation press 'm'.
Command action
a   toggle a bootable flag
b   edit bsd disklabel
c   toggle the dos compatibility flag
d   delete a partition
l   list known partition types
m   print this menu
n   add a new partition
o   create a new empty DOS partition table
p   print the partition table
q   quit without saving changes
s   create a new empty Sun disklabel
t   change a partition's system id
u   change display/entry units
v   verify the partition table
w   write table to disk and exit
x   extra functionality (experts only)

Command (m for help):
- To create a new partition
The sequence of commands required are given below
- Type fdisk followed by device file name as shown above.
- Press 'n' for creating a new partition.
- It will ask for partition type ( logical / primary )* . Select which ever is needed.
- Give the partition number
- Give the first cylinder number . Press Enter for default value.
- Give the last cylinder or the size required . For eg; +1024M for 1GB. Here also press Enter for default value
- To change file system type of the partition, press 't'
- Give the partition number
- Give hexcode of the required fs type ( press 'L' to get list of all fs types ).
- Press 'w' for writing the changes to disk. ( To exit without any change to partition table press 'q' ).
- To delete a partition
- Type fdisk followed by device name as shown above.
- Press 'n' for deleting a partition.
- Give the partition number
- Press 'w' for writing the changes to disk. ( To exit without any change to partition table press 'q' ).
* Only primary partitions have bootable property (OS can be installed in any partition as long as its boot loader is kept in some bootable location). A hard disk can have a maximum of four primary partition. To create more partition a partition called extended partition is to be created ( this will be counted as one primary partition ). Inside this extended partition many logical partitions can be created.
GUI is available for modifying the partition table. In SUSE they have their own GUI which can be found in Yast control center. In general
gparted (Gnome) and
qtparted are used as GUIs.
Posted in:
desktop,
disk,
drive,
partition
|
|
|
Feb 6, 2009
by mohamed hanoosh
GRUB( GRand Unified Boot loader) can be installed in many ways
- from current linux installation
- from live cd
- Installing GRUB from current linux.
Type the command # grub-install /dev/sda
where sda corresponds to the harddisk where the boot loader is being installed. The boot loader is in a small portion and hence it keeps all other necessary files in another location. By default the boot loader takes the configuration for the grub from /boot/grub/menu.lst
note: If the command was executed from a live cd then the grub will look for menu.lst in /boot/grub/ which is actually in the 'cd rom'. Therefor simply executing the command from a live cd won't work.
- Installing from a rescue cd
Rescue disks gives an option to boot into an already installed OS.(For example Suse gives options to boot into installed SUSE, Fedora gives option for 'chroot'into already existing fedora)
From there type command # grub-install /dev/sda
It will install grub.
- Installing from a live cd
I am considering Ubuntu as an example
execute the following commands
#sudo grub
grub>find /boot/grub/stage1
grub>root (hd0,0)
grub>setup (hd0)
entries for other OS (like windows ) has to be added manually.
- Another method to install from a live cd
$ sudo mount /dev/sda1 /media/disk
$ sudo mount --bind /dev /media/disk/dev
$ sudo chroot /media/disk
# grub-install /dev/sda
# exit
Posted in:
bootloader,
desktop,
grub,
system
|
|
|
Feb 3, 2009
by mohamed hanoosh
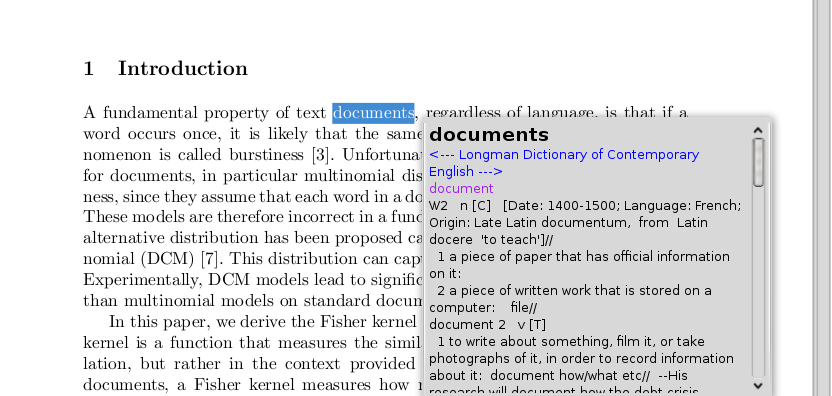
Stardict is both an online and offline dictionary for linux ( it is available for windows too).

Some of the features which I liked
- Different dictionaries like OALD(Oxford Advanced Learners Dictionary), Orient Longman, Meriam Webster , Britannica and a lot more can be added to it. They are freely downloadable from its site.
- Word can be specified as a regular expression which gives a list of available words matching it.
- Similar spelled words are also listed
- Keeping the stardict in system tray, selecting any text in linux it will give a pop up of meaning.
Go to
stardict home page for more details
Posted in:
desktop,
dictionary,
utility
|
|
|
Jan 20, 2009
by mohamed hanoosh
Use the command
xrandr to list all possible resolutions available.For eg;
hanoosh@hash>xrandr
Screen 0: minimum 320 x 200, current 1280 x 1024, maximum 1280 x 1280
VGA connected 1280x1024+0+0 (normal left inverted right x axis y axis) 338mm x 270mm
 1280x1024      60.0*+   75.0     59.9
 1152x864       74.8
 1024x768       75.1     60.0
 800x600        75.0     60.3
 640x480        75.0     60.0
 720x400        70.1
To change the resolution to one of them, say 1152x864 , type
$xrandr -s 1
Posted in:
desktop,
resolution,
xserver
|
|
|
Jan 10, 2009
by mohamed hanoosh
Outline TATA indicom wireless modem is a dial up connection. The utility wvdial is used to connect to internet. The tool require several parameters (username , password, modem type, phone number ..) to be specified. The parameters required can be kept in a config file and wvdial can be called specifying that file. The file can be created manually or using other tools.
The steps are explained below.
- Connect usb modem
- Type wvdialconf
This will create a file called wvdial.conf (either in current directory or in /etc ). Better you keep the file /etc (just move it).
- Modify the wvdial.conf to update the following
username , password, and phone number . For TATA Indicom modem the values are internet,internet and #777 respectively (please look at manual)
- Type wvdial
This will take the config file from default location (/etc/wvdial.conf ) . Otherwise you specify the path with -C switch.
Now the connection would have started if signal is available. If everything is ready it will display default route OK.
- To disconnect press Ctrl+c in the terminal where wvdial was started.
Posted in:
desktop,
dialup,
driver,
internet,
modem
|
|
|


